Wrenching Tip: The Importance of Calibrating Your Torque Wrench


Grabbed this from over on StangTV.com

John Gibsonby on September 19, 2012

Before we dive into what is one of the most often overlooked tools in the average man’s garage, ask yourself the following questions: Where is my torque wrench stored right now? When was the last time I used it? What is the current torque setting at on it? How accurate do I believe my torque wrench is?

We’ve seen a torque wrench be as far as 16 ft-lbs out of calibration – Chris Raschke

Every garage, engine builder, or race team has a torque wrench, and we all use it a considerable bit! But when was the last time you gave more than a moments glance at your torque wrench? Without a doubt one of the most often overlooked and most used pieces of equipment in any race teams or home garage has to be their torque wrench.

A torque wrench is a relatively inexpensive piece of equipment when you consider how often we use it to create serious horsepower or to ensure our wheels don’t come flying off when we put the car on the ground. A typical “click-style” torque wrench will usually run between $100-$400 and if cared for properly can last quite sometime.

Ensuring Your Torque Wrench Isn’t lying to you

What happens though when your trusty torque wrench has seen a few years, and you are starting to doubt the results it’s giving you. “We’ve seen a torque wrench be as far as 16 ft-lbs out of calibration,” explained Chris Raschke of Automotive Racing Products.


NHRA Teams can walk over to the ARP tent and quickly see just how accurate their favorite torque wrench is.

ARP understands how crucial it is to have a torque wrench that is calibrated correctly. ARP works closely with many of the top NASCAR and NHRA teams as well as numerous engine builders across the country to supply engine and driveline fasteners.

ARP has spent 2012 traveling across the country to every NHRA event offering a special service to the teams and mechanics in attendance. ARP brings a torque indicator that allows teams to test their torque wrench settings. Teams can walk over to the ARP tent and quickly see just how accurate their favorite torque wrench is simply by giving it a couple of pulls.

“We test the torque wrench at 50 ft-lbs and 100 ft-lbs to give teams a proper reading,” continued Raschke. “We encourage and stress that everyone to bring their torque wrench to our tent and see just how accurate the wrench really is.”

Torque Wrench Maintenance Tips from Harbor Freight

  • Before each use, inspect the general condition of the tool. Check for loose hardware, misalignment or binding of moving parts, cracked or broken parts, and any other condition that may affect its safe operation.
  • After use, wipe external surfaces of the tool with clean cloth.
  • If the Torque Wrench has not been used for some time, turn the knurled handle (clockwise and counterclockwise) several times to re-lubricate the internal workings. Then, operate at a low torque setting several times. This ensures proper operation.
  • Do not turn knurled handle below the lowest torque setting.
  •  Wipe Torque Wrench with a cloth to clean. Do not immerse in any cleaning solution. This would damage the internal lubrication.
  • Periodically have the Wrench calibrated and serviced by a qualified technician.
  • Store inside case in a clean and dry location.

Why It’s So Crucial To Check Its Calibration

ARP explained to us that they have seen torque wrenches as far as 16 ft-lbs out of calibration. It’s easy to think how dangerous it would be if it a wrench was -16ft lbs, but the important thing to remember is +16ft lbs would be just as dangerous, especially for engine builders.

For example, let’s say you are working on a Chevy Small Block and are installing the cylinder head bolts for a 18 degree standard port cylinder head. ARP recommends torquing their hex bolt kit to 70 ft-lbs in three increments of torquing.

This means at three different steps you are going to torque each individual head bolt first at 20 ft-lbs, then 40 ft-lbs, and then finally 70 ft-lbs. If you are torquing 16 ft-lbs to much or to little, you are setting yourself up for serious problems. You are either going to under torque or over torque your head bolts by 22% versus ARP’s recommended level!

Torque wrenches are often used to torque the lugs on a wheel before a car ventures on the track as well. We don’t have to go into a lot of detail here, you can imagine just how dangerous it would be to have a torque wrench that was under torquing your wheel lugs.

What To Do If Your Torque Wrench Is Off

Even if you take immaculate care of your torque wrench ARP advised us that mechanics should have their torque wrench tested once a year to ensure that it is calibrated correctly. If your torque wrench does happen to be off by a few ft-lbs then what is the best option?

“We don’t actually calibrate the torque wrenches that are a few ft-lbs off,” Raschke explained to us. “Most all of the popular tool trucks like Snap-On and others will send the wrench in for calibration. In fact Sears provides service for their torque wrenches.”

How To Avoid A Wacky Torque Wrench

The next question has to be, how can you avoid ending up with a Torque Wrench that is out of whack?

ARP explained to us that the biggest mistake they see people making is not taking proper care of the torque wrench, and offered us a few tips to ensure that you get the maximum life out of your torque wrench.

  • If possible store in the manufactures case inside a dry area. Treat it as a delicate piece of equipment.
  • Always remember to back off the torque indicator to a low torque setting before storing it for the next use. The click style torque wrenches contain a spring and by having a high torque setting compressing that spring for an extended period of time will cause the spring to “set” at that length.
  • Purchase a torque wrench that operates within your torque range. If you are going to be checking torque levels at 80-100 ft-lbs on a consistent basis then you need more than a typical 100 ft-lbs torque wrench. You should be looking in the 200 range. This will allow the torque wrench to give you a more accurate reading as the torque wrench will not be nearing it’s max torque setting.
  • Do not turn knurled handle below the lowest torque setting.

    ARP encourages and stress that everyone to bring their torque wrench to their tent at every NHRA event, and see just how accurate the wrench really is.

  • Never turn the wrench past the “click”.
  • If the Torque Wrench has not been used for some time, turn the knurled handle (clockwise and counterclockwise) several times to re-lubricate the internal workings. Then, operate at a low torque setting several times. This will ensure proper operation.

Top engine builders and mechanics understand the importance of having a torque wrench that is measuring properly. This is why so many are now opting for the high dollar (some as much as $4,000) digital torque wrenches that can provide extremely precise measurements. But even these need to be checked often to ensure that the number you are seeing is the correct amount of torque that is being applied.

A torque wrench is a valuable tool, but if it is not properly used and cared for it can become your worst enemy. Don’t place your hard earned dollars and more importantly your lives at risk by assuming that the torque wrench you have is reading correctly after all these years. Get it tested and ensure that “tight” bolt is actually tight!


Right after I read this I went out and checked on my pair of torque wrenches.

One of them is old school.  Looks like this:


This one is just laying around in one of my Mac Tool  toolbox drawers.

The other that is similar to the one here in the article is in its plastic case.

Wonder which one I’ll use again?
Thanks for reading.

Tim


1958 Ford Ranch Wagon – I’m in the Dog House: Front Clip Removal


FROM –  http://ranchwagon.wordpress.com/2012/07/29/im-in-the-dog-house-front-clip-removal/

Posted: July 29, 2012 in Uncategorized

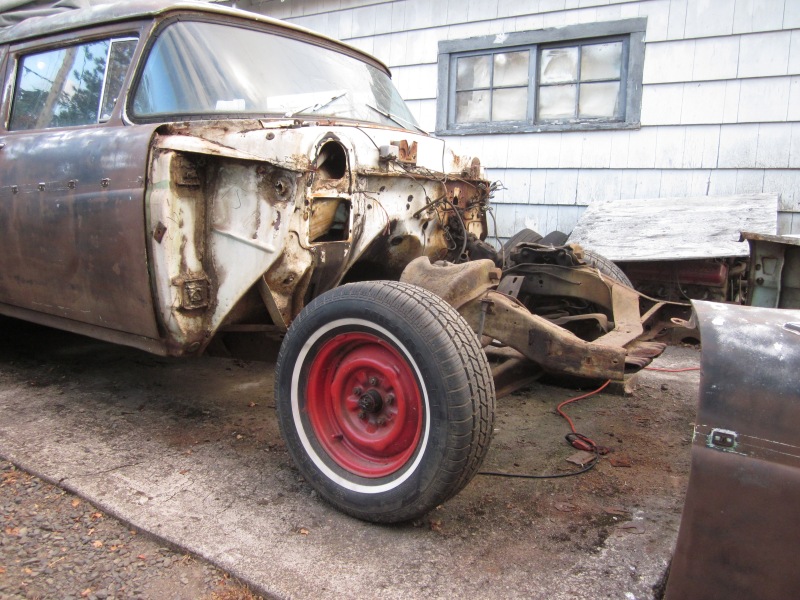
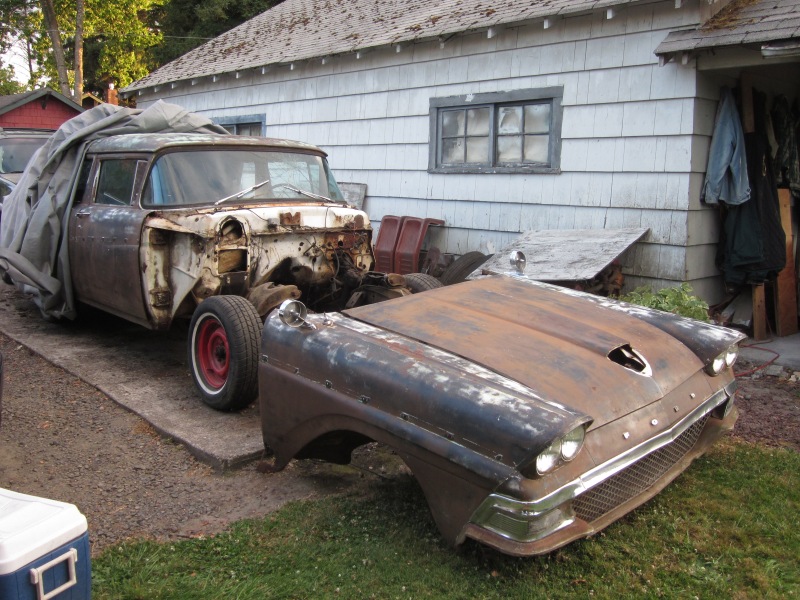
I decided the time had come to get the front clip taken off the Wagon. I wanted to get the front frame cleaned up, and do the front end by the end of summer. I am shocked at how few bolts actually hold the whole front clip onto the ’58.  11 bolts, disconnect some wiring, and you can lift the whole front Clip (Dog house) off in one piece.  It’s taken me longer to change the oil on a car than to remove the front clip on this car!

Image

First  I had to remove the front bumper with brackets attached. That was fine, except for the one chrome bumper bolt on each end of the bumper. They fought back pretty good. I had to sawzall them off.

Image

I was without any help to lift the front clip off, so I had to tilt the front forward onto some large Foam cushions I had saved out of an old travel trailer I had gotten rid of years ago. They are a perfect for laying under vehicles to work on, and for cushioning large loads like this.

Image

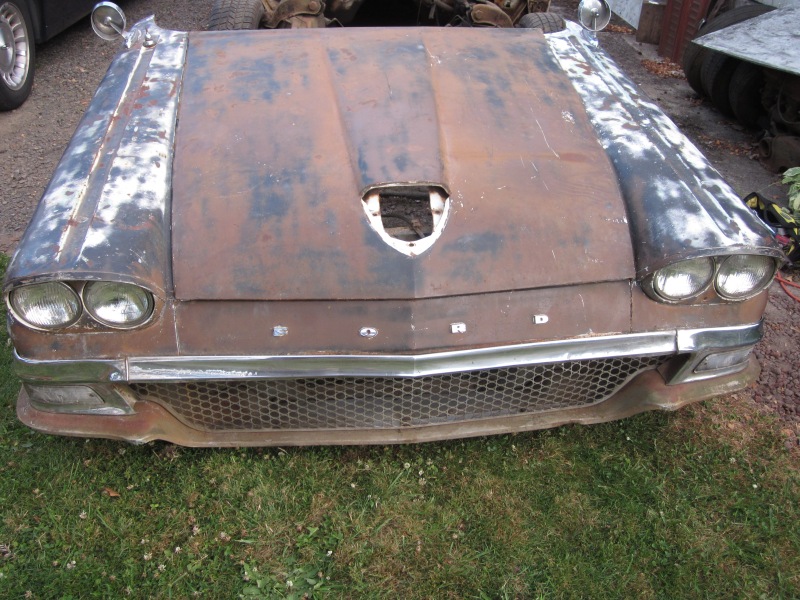
Next I will be removing the wiring from the front clip and saving it for future use. This front clip needs work. The front fender bottoms are rusty, and the hood is so badly rusted it is of no use. So either I will sell this old clip to someone who has nothing, or dismantle it, save parts and scrap it.


Parking Lot Spotlight 6/13/2011

Here is another cool  car sighting.

This one was in the parking lot of the a local auto parts store Checker’s or O’Rielly’s….or….all those mergers are making hard to have common name that everyone can related too (remember when there was just NAPA….can’t find them very often).

1969 Chevelle 454 Restored shell

This 1969  Chevelle  was merely as shell…oh but is extremely well done restoration.  The paint was excellent (makes ya wonder why it was being dragged round uncovered), the inside of the shell had been as expertly sprayed as the exterior..it was almost a shame to put in the interior in there.

Reproduction gauges and not much in the way of interior yet.

The badge on the car shows that this car housed or will house 454.  But however, the 454 didn’t show up on the scene until until 1970 so this must be a retro fit.

You can see the big power plant is missing.

It looks absolutely ready to for dropping that monster engine back in and hitting the strip.  Hey I don’t even mind the wheels!!!

Didn’t find the owner (or driver) , part store was crowded.

Of course this isn’t a 1970, I’ll update the data a bit later.

Some 1970 Chevelle facts:

– The 454 was produced between 1970 thru 1976.

–  It produced 450 hp configured with 4bbl carb

–  It was designated the LS6 with 475 ftlbs of torque and 9.0:1 compression ratio

The majority of the Chevelle’s  (approx. 13,000) had V8 in 1970 and approx. 10,000 had 6 cylinders.

Thanks for reading.

Tim

NMC – Pace Car Display.

This is a great collection for Indy Pace cars.

[vodpod id=Video.9452167&w=425&h=350&fv=file%3Dhttp%253A%252F%252Fvid299.photobucket.com%252Falbums%252Fmm296%252Ftimsweet2200%252FPaceM-9.mp4]

NCM – Mobil Oil Display

There are some great displays at the museum.  This one is the Mobile Oil service stations.

[vodpod id=Video.9084512&w=425&h=350&fv=file%3Dhttp%253A%252F%252Fvid299.photobucket.com%252Falbums%252Fmm296%252Ftimsweet2200%252FM-3.mp4]

NCM Raffle Cars C4 and Owner Pick up

At the entrance. Here are two of the cars that are up for raffling. There is also the a vette you can “try on”. In this clip I stated that the vettes at the end of the building were there for customer to sit. No true. That is where the code R is fulfilled. Code R is for delivery at the NCM. You can view a 1984 C4 in the window.

[vodpod id=Video.9074107&w=425&h=350&fv=file%3Dhttp%253A%252F%252Fvid299.photobucket.com%252Falbums%252Fmm296%252Ftimsweet2200%252FM-1.mp4]

Thanks for reading
Tim

Chevy’s 283 – OH WOW – 300 HP in a What?

 So I just can’t let the 283 go.  I will find one,  restore it and hang it from my garage ceiling, umm…yeah..I don’ t think the misses will have a problem with that….ok maybe just store it a corner of the garage..or turn it to a coffee table..yeah……um…no.
Check out his 1966 Corvair with 300 hp 283.
Link is here:  http://www.automobilemag.com/reviews/driven/1012_1966_corvair_corsa/index.html
1966 Corvair Corsa Front Three Quarters In Motion

REVIEWS:

First Drive: 1966 Corvair Corsa

From the December, 2010 issue of Automobile Magazine
By Don Sherman
Photography by A. J. Mueller

The Chevy Corvair’s swing axles and heavy tail are implements of the devil, at least according to Ralph Nader’s Unsafe at Any Speed diatribe. Paul Siano, the creator of the mid-engine Siano Special, doesn’t buy any of that. He has owned, modified, and drag-raced Corvairs for more than half of his seventy years without suffering a single unintended spinout.

Siano bought — brand-new — what began life as a 1966 Corvair Corsa after supercharging a Volkswagen Beetle and owning a ’64 Corvair Monza Spyder convertible. He drove the coupe 50,000 miles before ripping out the stock 180-hp turbo engine.

A vintage Crown Manufacturing kit provided the means of upping the cylinder count and moving the engine from the back porch to the rear seat. That package included a tubular-steel subframe, an engine-to-transaxle adapter plate, a new transmission input gear, cooling-system pipes, a new shift linkage, and two new antiroll bars.

Siano’s prize possession is a rare, experimental, 283-cubic-inch aluminum engine block that General Motors pitched out as scrap. Engine builder Bryce Flinn added a roller cam, aluminum heads, and the induction overkill. Siano fabricated the necessary bits and brackets with an emphasis on minimal weight. He also added four-wheel disc brakes, Minilite wheels, radial tires, and a Ron Davis aluminum radiator.

Siano didn’t partition off his eight-pack of Weber intake trumpets, because he’s a patron of the rolling, reverberating, internal-combustion arts. Living with Webers is not for the meek of heart. When cold, they spit and stumble. When they’re up to operating temperature, they fill the interior with a combustible cloud of reversion gases. Smoking is discouraged.

Headphones are available for those rides when hearing preservation takes precedence over the din of a barely muffled Chevy V-8. Only two things keep the whirring water-pump pulley from biting the occupants’ elbows: the flush bolts that Siano installed in place of hex-head screws and every human’s natural preservation instincts

1966 Corvair Corsa Cylinders

REVIEWS:

First Drive: 1966 Corvair Corsa

|
More Photos
1966 Corvair Corsa Front Three Quarters In Motion
1966 Corvair Corsa Engine

When we drove to the test track, Siano’s homebuilt special revealed evil streaks: quick but heavy steering, vague shift linkage, and a throttle pedal that offers yes and no but very little maybe. However, a few miles were enough to establish an amicable working relationship.

Offered the opportunity to redeem itself, the Siano Special settled into stride to post a reasonably impressive performance report: 0 to 60 mph in 5.2 seconds, the quarter mile in 13.9 seconds at 104 mph, and a top speed of 130 mph. More amazing, the handling balance is excellent, offering just under 0.90 g at the limit of adhesion and only a touch of easily controlled oversteer when the fourteen-inch BFGoodrich Radial T/As finally let go. The cobbled-together chassis held firm over bumps, and the dampers kept body motions nicely controlled throughout the testing gauntlet.

Back in the Corvair’s day, GM fiddled with various mid-engine sports cars, only one of which (the Pontiac Fiero) ever made it to a production line. Leave it to a motivated Corvair enthusiast to demonstrate what can be achieved by adding a couple of cylinders and relocating the engine to a more productive location.

The Specs
Engine: 4.6-liter (283 cu in) OHV V-8, 300 hp (est.)
Weight: 2600 lb
Weight distribution f/r: 44.0/56.0%
Drive: Rear-wheel

Engine Mini-Series – Pontiac’s 326 Prt 2

The 326 was used as the base model for the Pontiac Tempest.  That was going to be the extent of the division’s uses for this engine.
For 1963 and 1964 production years that was the case.

But in the 1960’s GM had a rule that production A-body or intermediate-size car would carry no more than 330 cubic inches and none were to be sold.  Pontiac had the idea that they would bring on the Tempest GTO would have the 389 as its base engine, but GM set the rules.  So the best Pontiac could do was to offer the GTO with the base engine as the 326.

1964 Tempest GTO, Yes you'll find 'em with a 326

However, on the order form there was a check box to order the 389.  This is how the 326 got in to one of the most famous iconic cars of the muscle car era.
1965 was the year and the 326 offered was with 250 and 285 hps in both automatic and manual transmissions.

That’s enough to make it a piece of historical automotive hardware. But there is one more noteworthy pair of shock towers this power plant was mounted between that was the 1967 Pontiac Firebird.  Yup it powered up its second iconic car with a 250 hp version and a 285 hp version.

326 in a 1967 Firebird

67 F-bird

And that, fellow car crazies, was the short life of Pontiac’s 326.

Thanks for reading.

Tim

What’s Going On? How about an update?

That’s an email from a reader.  Been under the weather for a few days and a heavy workload this time of the year where I “pound salt” (hopefully a fair ratio of people get that).

So here is what is coming up:

Finish up the series on the 326 Pontiac engine.

Finish up the last couple entries for the Name That Car Contest (tally for this latest round coming up).

Feature Car – one of the Studebaker’s models.

Update on my 1970 Mustang “make-over”.

And some other stuff.

Thanks for reading.

Tim

Checker Cab Note from a Reader

Thanks Bill.

This web site claims you CANNOT tell Checker years 1960 to 1982 apart:

http://jalopnik.com/#!266317/checker-marathon

I still wonder what would have happened to Checker if Ed Cole had not died in a plane crash. Ed Cole was a GM Engineer who was ‘the father’ of the Chevy 283. The story goes that Checker was about to go out of business, and Ed Cole had accepted an offer to take the company over. Ed had retired ‘comfortably’ from GM, and wanted to have some fun with Checker. Legend has it that Ed planned to get the GM Impala/Roadmaster RWD chassis, drop in a a Mitusbishi V6 drivetrain from the Diamante, and keep the SAME Checker body panels. His goal was to keep the car in fleet sales with great MPG and long term reliability,

Knowing what I know today about Government regulation for automobiles, I have to think that Ed Cole would have prolonged Checker perhaps another few years, or so. Crash test alone cost about 1 million dollars per car model today.

My THREE cents for the day!

Happy Easter, Bill