C4 Vette Valve Cover Gasket Replacement Part V

I’m now at the point where I can re-install the valve covers.  I’ve painted them and cleaned up the gromets (for one of my vette buddies who was dismayed when the saw the interim pics).  

If you remember I had to remove a few things including vacuum hoses, spark plug wires, a/c parts.  In addition the bolts that hold the covers down had spark plug wire holders  and other brackets for hold wires.  

Brackets that would mount through with the bolt for the covers passing through.


Keep this in mind as I explain what I learned from my decision to use Fel-Pro gaskets. 

Ok..fine enough dramma..lets get to the lesson I learned (which is often learned the hard way when you have average skills and less than average experience). 

I am not smarter than the engineers at GM.  They knew what they were doing when the used permatex…it was all about the bolts.  Specifically, the length the engineers decided do use, or maybe it was the budget guys. They knew how to follow the build sheet. Here is the bottom line.  The length of the bolts supported the thin layer of the permatex and the brackets shown above and that was it. 

They did not support the thickness of the gaskets.  They were just under a 1/4 too short.  With the brackets and the Fel-Pro gasket in place barely two threads poke out, not enough to catch the thread on the engine.  errrk….When did I know this and what got into your head to do it anyway? 

Fare enough question.  I found out when I queried a couple of Corvette forums about what gaskets to use.  I got a lot of responses, everyone has an opinion..ya know!!!  But only one had actually done an 84 C4 and he said..if you don’t use permatex you are going to have to get longer bolts and BTW your bracket for the spark holders won’t fit.  So I knew this before  I picked up the valve covers (but not before I ordered the set from the supplier).  

Why I didn’t go with the permatex solution was the amount of space and jostling what I had to do when I took them out.  I was pretty sure getting them back in would be worse and the changes of wiping off the some of the permatex and messing up the seal, making the odds of redoing it high. 

Finding the longer bolt took some doing.  The auto parts store…yes..yes.. the same one that said they didn’t have anything but cork and when querying another employee show me what I and originally asked for..didn’t have the proper bolts.   The 84 C4 was all metric, bolts and nuts, you can even switch the digital the dash from US to metric.  The heads are 11mm the threads were 6mm and the pitch was 1/4. 

I ended up at ACE hardware and the only thing that would work and look good were the chrome.  Ok…average guy with average budget…warning..they weren’t cheap…I know that when the manger took me to the back of the store and showed me a stack of boxes that were padlocked shut.  They lock them up!!!!  They were over $2.00 each, washers were nearly a $1.00.  

So I decided on the chrome but they only had 7 bolts..I needed eight with washers as well, they only had 1 washer.  When did we as a nation have a shortage chrome???  Any way I went ot another Ace and the guy there didn’t have any, but tried to tell me the ones I purchased at the other ACE wasn’t correct.  He had the washers so I picked those up and traveled to the next ACE (they’re a lot like Walgreens..they’re on nearly every corner here in Tucson). 

Replacing the covers was about the same as removing them and while doing it I was very glad I didn’t use the permatex, most of it wouldn’t have made it on the covers or the engine.  I’m thinking at the GM factory they put the valve covers on before the AC and all the vacuum hoses and alternator…etc. 

Tomorrow I’ll  finish this up….well maybe…one more lesson was in store. 

Thanks for reading. 

Tim

Auto Factoids for 4/03/2010

Later than usual in  the week, but I’ve been busy with the valve cover work.  So here ya go.

4/5 /1923 Firestone inflated the production of balloon tires.

4/9/1957 Lotus’ first single seat race car

Thanks for reading.

Tim

C4 Vette Valve Cover Gasket Replacement Part I

When I advertised this project I blogged that I didn’t understand why GM, given how hot the 1984 C4 ran, would use cork as the material for the valve cover gasket and how I wouldn’t replace them with cork. So I called a popular Vette parts supply house and ordered Ultra-Seal.  I did check locally. ok fine, I checked one place, the Checker Auto down the street, where, through some extremely ineffective communication (the guy didn’t know what he was talking about or what they had in stock), the employee said, “All we have is cork.”;  to which I said, “No, thanks.”; to which he said, “I can order something else.” to which I said, “So can I.”   (There… that bit of typing is for you grammar-sensitive types.)

I also tossed a query on the forum for the Vette group I belong to, and a couple said they do still use cork, and a  couple highly suggested Fel-Pro.  Funny, they said they got them from Checkers.

Yesterday, I received the Ultra-seal (made by Mr. Gasket) I ordered from the Vette parts place. The Ultra-seal…was cork!!!!!! So much for the description on the web.  So I got on the phone to the Checkers down the street and I got an employee that actually knew what they had in stock.  They had every type: rubber, rubber with metal, liquid, metal, and cork.

So when I got there, I picked up the set of the Fel-Pro and Mr. Gasket’s rubber gaskets.  I hear my inner critic say “Hey, average car guy!!!  Yeah…I’m talkin to you, Mr. Average budget!!! What do ya think ya doin’?!!”

Here’s the deal.  I’ve never taken the valve covers off the Vette before, I’m not sure about the clearance, or the angle of the plane the valve cover sit..yadda..yadda.  Plus, I kept the receipt so I can return them…and I will!!!!  Promise!!!

So the Ultra-Seal looks like this:

CORK…BAD!!!!

Sorry about the pic ..didn’t open them because they have to go back.

The Mr. Gasket I purchased from Checkers was metal covered with thick rubber:

Mr.Gasket Rubber and Thick Metal

They are very similar in thickness and shape as the Ultra Seal.

The Fel-Pro are the ones I’m going to put on the car.  They are metal covered with thin rubber and the holes are re-enforced with metal washers and are grooved.

Fel_Pro grooved and will hold better during installation.

So that will be next up.

Thanks for reading.

Tim

Wrenchin’ Tip – Hose Installation 3/31/2010

Often if you get the right size radiator or heater hose it will be a tight fit(eerrrkkk….don’t tighten the clamp first!!!!….just kidding…eeerrrkk) getting it over metal fittings.  You can buy them bigger but you are asking for leaks!!!!   Here are a couple of tips.  One I’ve used and the other I haven’t tried yet.

1.  I live in Arizona, and it’s hot here and normally if you are going to have problems it will be from over  heating in the summer time.  I’ll take the hose and leave it on the concrete driveway for a while in the hot sun.   That often softens it up enough to slip on.

2.  This one I have not tried.  If you have clear wire-pulling  compound, you can rub a light amount around the inside of the hoses and it will slide right on.  Here is a link where you can find some.  http://www.twacomm.com/catalog/dept_id_608.htm

Thanks for reading.

Don’t forget our project car contest.  $100.00 online shopping gift card to your favorite auto parts web site.

Tim

AUTO Factoids For Week of 3/28/10

Light week this week. 

Audi introduced its Quattro in 1980.  Quattro was a 4 wheeled drive sedan. 

1970 AMC released it’s Gremblins (pun intended) 

1970 Gremblin...you know you wanted one back then!!!


Here is a biggie 

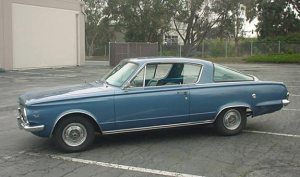
First Plymouth Barracuda showed up 1964 

Not Actual the 2.3 million dollar Cuda..but get the 6 cycle and slap shifting and go!!!


The last Corvair was made in 1969 (April 1)  (some records say the last one was actually produced on May 14 /69 

I don't know...my bother-in-law has one, he likes it.


Amphicar showed up in New York Auto Show in 1961. 

I actually saw one of these when I was a kid - drive off the beach and into the lake...thought it was the coolest thing.


One more biggie!!! 

Walter Chrysler was born in 4/2/1875 in Kansas. 

Thanks for Reading. 

Tim.

70 Mustang Dash Removal Videos

Sorry for the technical issues with the videos. It seems that WordPress has issues with longer videos, so I’ll have to keep them a bit shorter.

These next links will take you to the videos, but you’ll have to click the back button to get back to the blog.

This first video is when my son and I discovered that there was an additional bracket under the lower trim pieces.

http://s299.photobucket.com/albums/mm296/timsweet2200/?action=view&current=MVI_6869.flv

This next video is view of the partial removal.

http://s299.photobucket.com/albums/mm296/timsweet2200/?action=view&current=MVI_6876.flv

This last is the rest of the removal.  I tossed a little humor in there about feed my son Ryan only if we worked for the meal.  Not sure he thought that was too humorous..but I’m his Dad..he has to deal with me.  🙂

http://s299.photobucket.com/albums/mm296/timsweet2200/?action=view&current=MVI_6877.flv

Again, sorry these take you out of the site, I will work on this for the next video uploads.

Thanks for reading.

Tim

Reminder:  PROJECT CAR CONTEST..GET YOU PROJECTS IN!!!!

70 Mustang Dash Replacement – Removal

So the process was fairly straight forward.  Only thing not obvious was the removal of two trim pieces that hid the front bracket.     

Philips screw..wow how ugly was that old dash???

Top screw removal

There were 3 philips screws along the dash next to the windshield.  A nice long screw driver worked nicely.  The holes in the dash cover for the screw were pretty deteriorated, but it was good do know that the dash was really metal covered with the padded vinyl so the screw would hold forever.     

passenger side screws – remove and done!

There were 4 more screw on the passenger’s side.  Now if this were a Mach I it would have a clock located there, but instead there is just a plastic panel.  You could actually place a LCD monitor there for  DVD player.   The panel is below:     

passenger’s Side Panel

The next set of two screws that needed to come up were located above the radio.   These were a bit awkward to remove. But they weren’t philips screws..that pieced together with what we found after taking the dash pad out led to a conclusion of…well I’ll hold off mentioning that until I give you the other piece.      

Arrows show the position of the two screws

After removing these two “non-philips” screws (flat) the dash pad would lean forward and you’d think it would pop right off …but nope!!!  The next photos show why.     

Dash Pad leaning forward.

Additional Trim piece that needed to be removed.

One screw and off it came.

Caption is wrong here the side screw was removed but there was still one below.     

Bottom screw had to just be loosened and the pieces sliped off

One this pieces of trim was removed you can see the screw/bolt that need to be removed.     

Not a great pic..but you get the idea.

One on each side and the dash pad was ready to go.  Check out the videos.  If the videos don’t work..let me know.     

I enlisted the help of my son Ryan.  He was over for dinner and he lent me hand, so I could film as well.    

This first video shows us discovering the front brace hidden under the trim piece.     


Here is the backside of dash pad.     

The paper tag on the bottom of the dash pad.

Reading that you can see the date of 1972 on the tag. Since the Mustang is a 1970, the date doesn’t make sense. Adding that the screws near the radio that don’t match (straight vs. philip for the rest) I wondering if the dash wasn’t replaced.  The original owners didn’t mention it, but there was no real reason too.  This could mean that the dash was replaced with what appears to be NOS (new old stock) (from 1972)..that’s a possibility.  I’ll do some more research just to find out.     

The last few pics are of the other markings.     

The two eights – one upper in maker and the one in the glue.

Parts code perhaps 3 24 (d) 2

Sorry..that one’s upside down. 🙂     

The original Ford speaker.     

Speaker with part number.

So what’s next?  I’ll check out the wiring and pull the gages if I need to for repair (although all the gages are working fine). Oh..yeah..do a bulb replacement.     

More to come     

Thanks for reading.     

Tim

1970 Mustang Dash Replacement – Old one is out!!

Spend the last part of today taking the dash out of the Mustang.  It went very smoothly.

I was originally worried about rust up near the windshield.  But a quick check showed nothing major.  I’ll be giving it a good look tomorrow.

I still have to go through the videos and pics, so I’ll post them up late this evening or tomorrow.

Stay tuned.

Thanks for reading.

Tim

Wrenchin’ Tip Restoring emblems 03/18/2010

Many of our cars have worn out emblems that were once painted…Ok..I’m a lucky average guy…the Mustang’s emblems are all chrome and my Corvettes are mostly plastic.  

But what about some those that need painting.  Look for a flow  pencil.  

Flow Pencil for paint your emblems.


These are pretty reasonable and make painting small areas a bit easier.  

Thanks for reading

Project Car Of the Week and Month

I’ve been think about doing this but the rules seem a bit tough to come up with.  But I’ll give this a try.

I’m looking for some project car posts from the readers. Your projects.  Anything from a huge wreck of car project to something smaller (bigger then an oil change).  It has to be your car and you are doing “some” of the work on it. That the only hard and fast rule.

I’ll need a couple photos and some brief details.   You can post them up here or find me on Facebook and post the them up or email them to me (timsweet@cox.net).  I’ll post them here and then on my website (www.tucsoncarevents.com) for everyone to look at.

If I get enough entries I’m pick a car of the week the week and then out of the we’ll vote on the car of the month (if I don’t get votes posted up I’ll have one of my regular readers pick it.  The winner the car of the month gets a $100.00 online gift card as an auto parts dealer (Summit Racing or even on tailored to your car).  Simple as that.

So let’s get started. Remember anything from a total wreck to just a transmission swap, body work, paint, interior upgrade, hood swap.  That all works.  Sorry Pdawg giving Burt a bath and vac isn’t going to cut it (but he could use one!!!…just kidding).  It doesn’t have to be done and I don’t need a before and after, just what you are working on.

I’ll this run until I get at least for to choose from, then we’ll vote.

Note:  If you noticed my site is not commercial, there are no ads, no click through links, no pop ups.  It’s just me type to hear myself type and a few of you reading it.  I like it that way.

Thanks for reading.

Tim